
Throughout my entire life, I’ve struggled to be organised. In high school, I would constantly buy notebooks and planners in an attempt to sort out my life and my schedule. Naturally, all of those notebooks went to waste and just sat on my desk gathering dust. In year 12, I discovered the Bullet Journal and it really helped me get it together.
The original bullet journal was created by Ryder Carroll as an adaptable way to plan out your day to day life. You can buy the pre-set journal online, or you can create your own just like thousands of others across the globe. All you need is a pen and a notebook, and you’re good to go.
The appeal of a bullet journal (BuJo) and the bullet system is how customizable it is to your needs. In year 12, I needed to focus more on my HSC and study, as well as sorting out my post-high school plans. My BuJo gave me the ability to plan, track my study and habits, as well as keep lists of everything I needed to do. As a university student, I need to do all that and much more – I have the option to keep my notes and my general diary entries in there too.
So, how do you start?
Grab a notebook – lined, dotted, blank, 500 pages, 60 pages. Whatever you have laying around or whatever you think you’ll need. Now, grab a pen – preferably black or blue, but it doesn’t really matter. As someone who has tried these all, I’d personally recommend a 249 page A5 Leuchtturm1917 dotted notebook with any kind of black pen, but again, it really doesn’t matter.
The BuJo is most notable for its bullet system which stays consistent throughout most variations. Leave the first page blank – flip to the second page, and on the page to the right is where you’ll put the key for the bullet system. You’ll be flipping back to this whenever you make an entry.
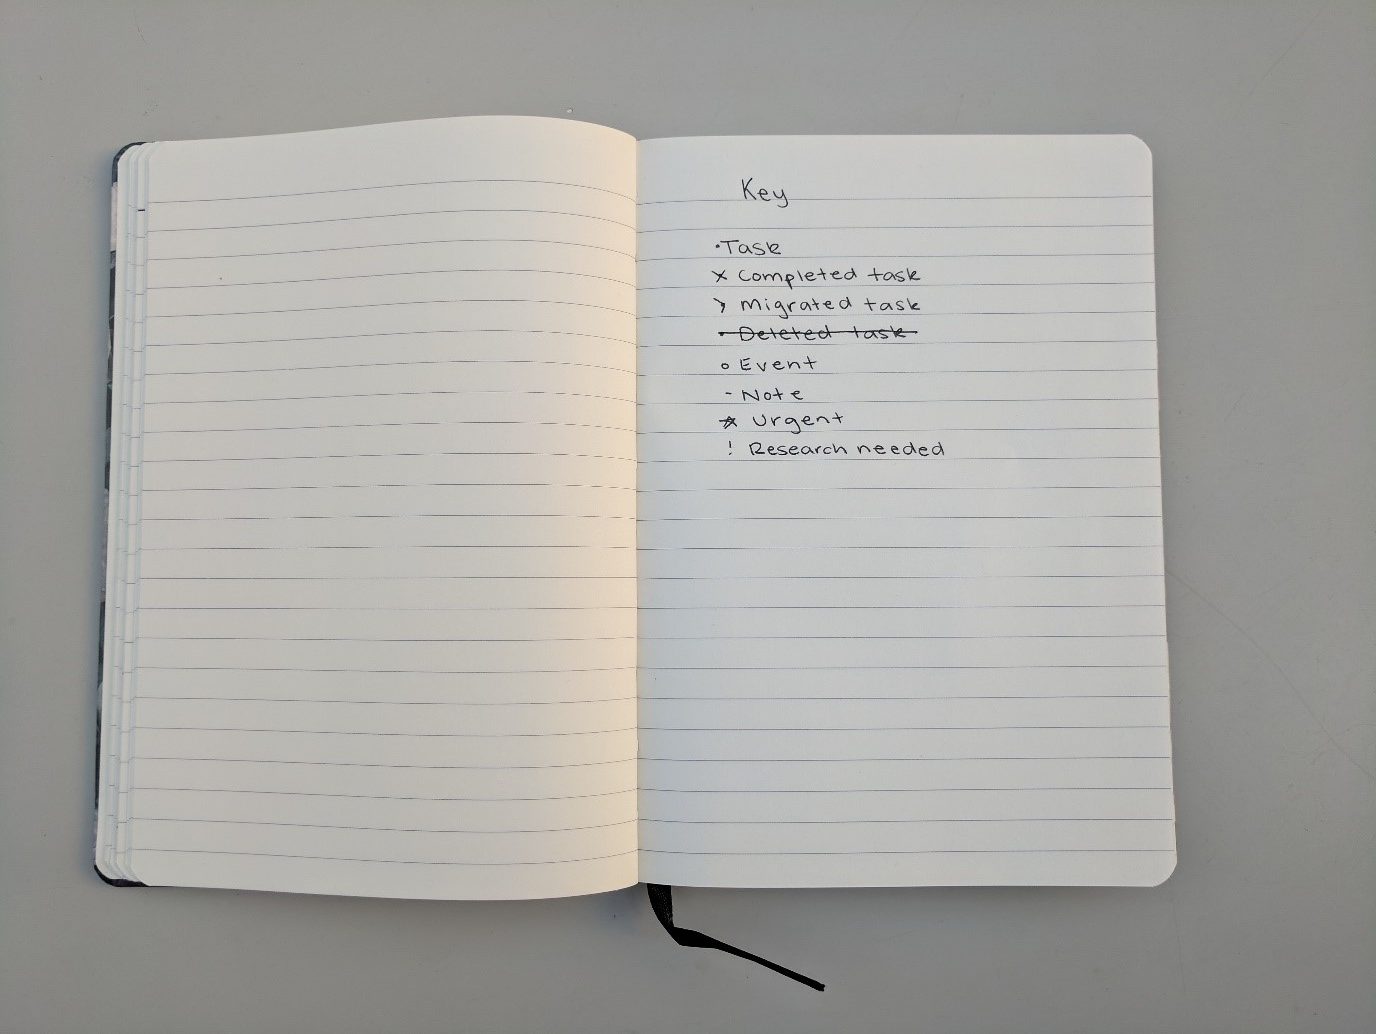
This is essentially the guideline for bullet journalling. Some variations of the key have different coloured pens involved or use capitals rather than the standard key. That’s okay! Don’t be afraid to play around and find something you like.
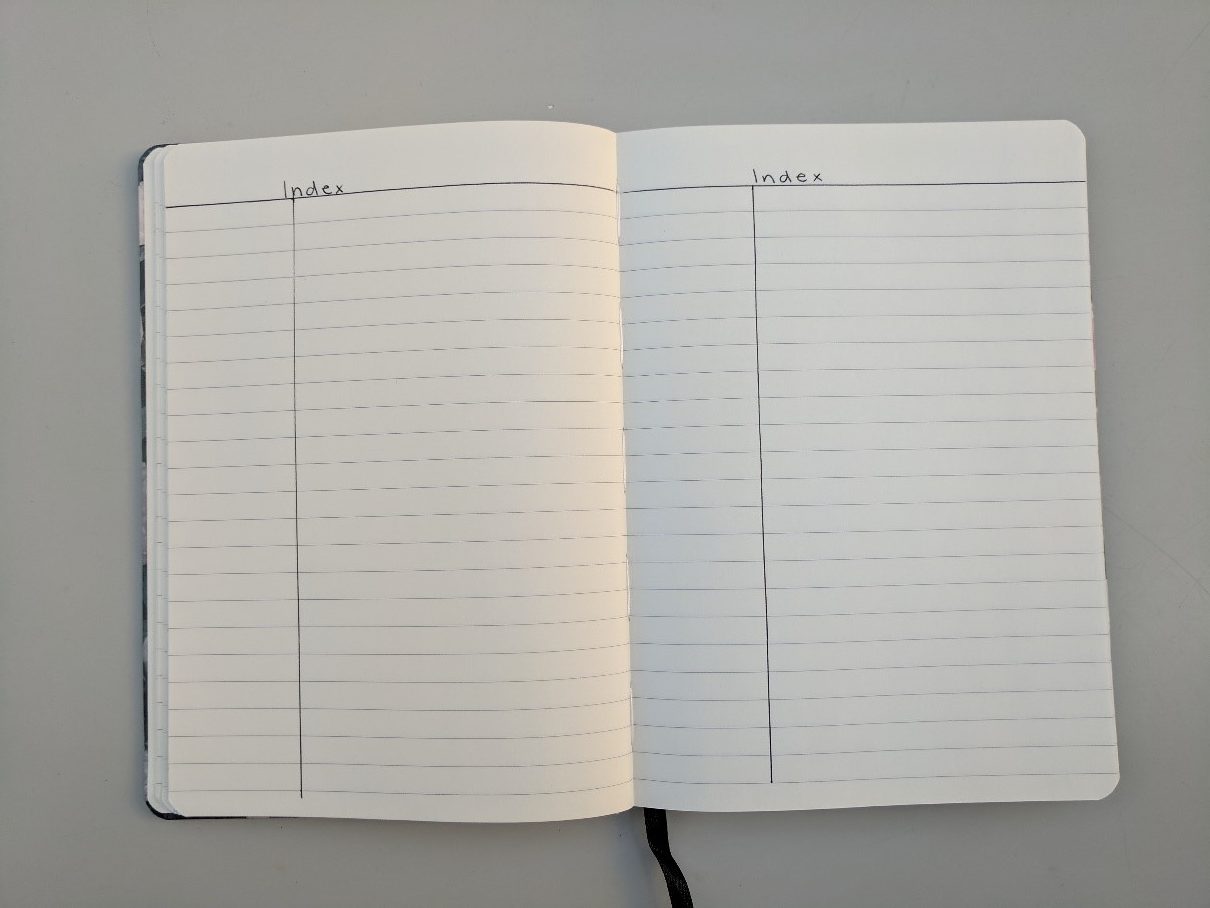
Next up is the index. Many people don’t even use an index – it’s not a necessity, but it really does make organising your life and plans just that little bit easier. As you go through the journal, you’ll write yearly, monthly and weekly plans (don’t worry, I’ll get to that later). The index is just a simple way for you to find it all when you’re in a rush.
Start by titling your index, then rule a line across the page separating your title space from the rest of the page. Measure out around 4cm from the edge of the page and rule a line straight down. Your page should now be split into three sections – the title section, a thinner section on the left where you’ll put your page numbers, and a thicker section on the right where you’ll write the titles. Repeat this for the next two or three pages, depending on how thick your notebook is. Now, whenever you write a page in your BuJo, write a simple title, number the page, and write it into your index.

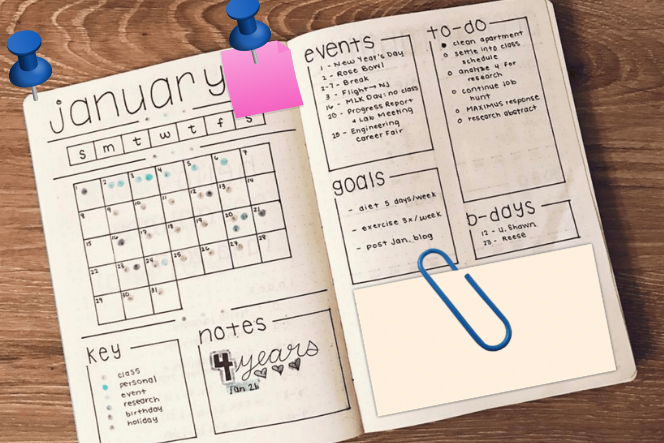
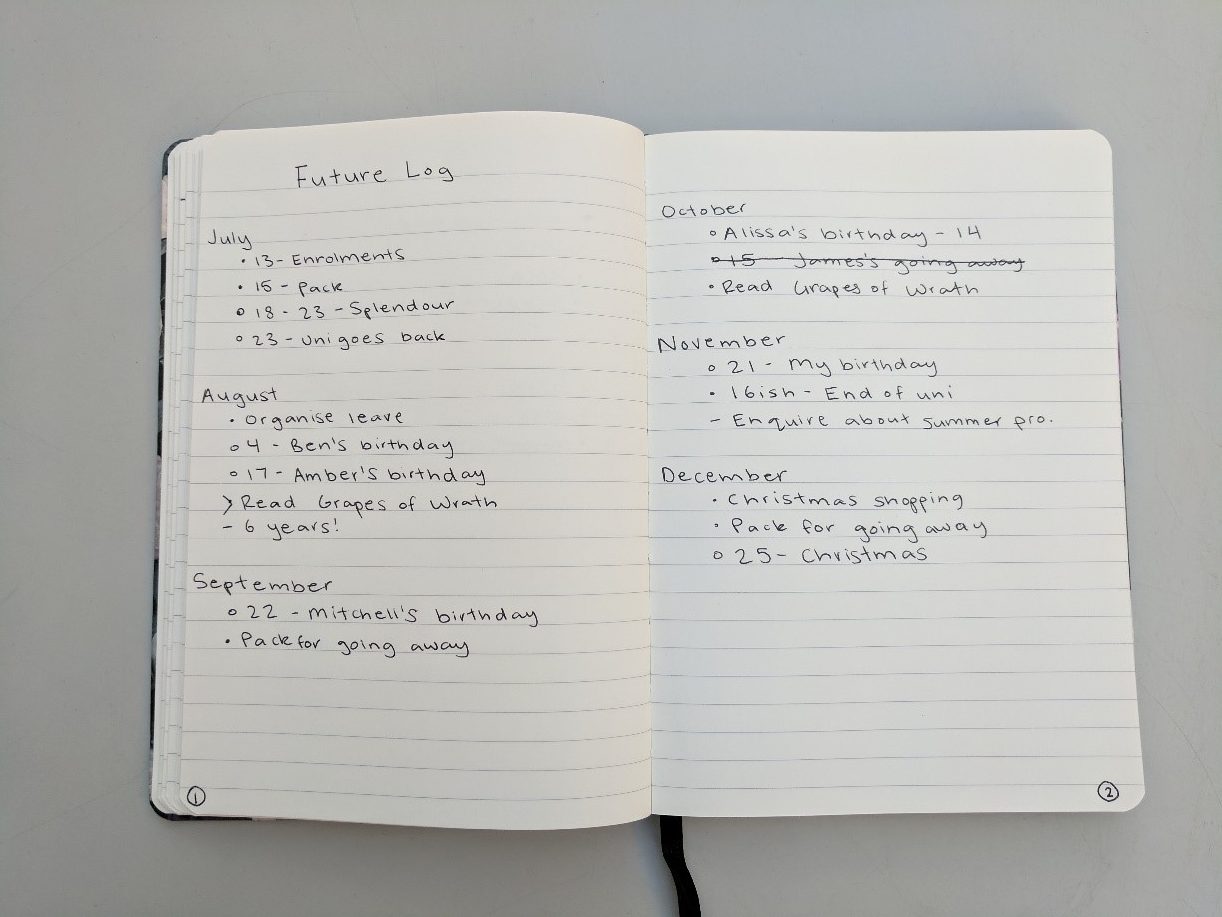
You have the bullet system set up and you can keep track of your entries, so now it’s time to start planning. Add a yearly plan or future log with the months set out, followed by a monthly plan for the month you’re in now. This is where you add very broad things – birthdays, holidays, important events – but no specific details. Don’t be afraid to create your own key here!
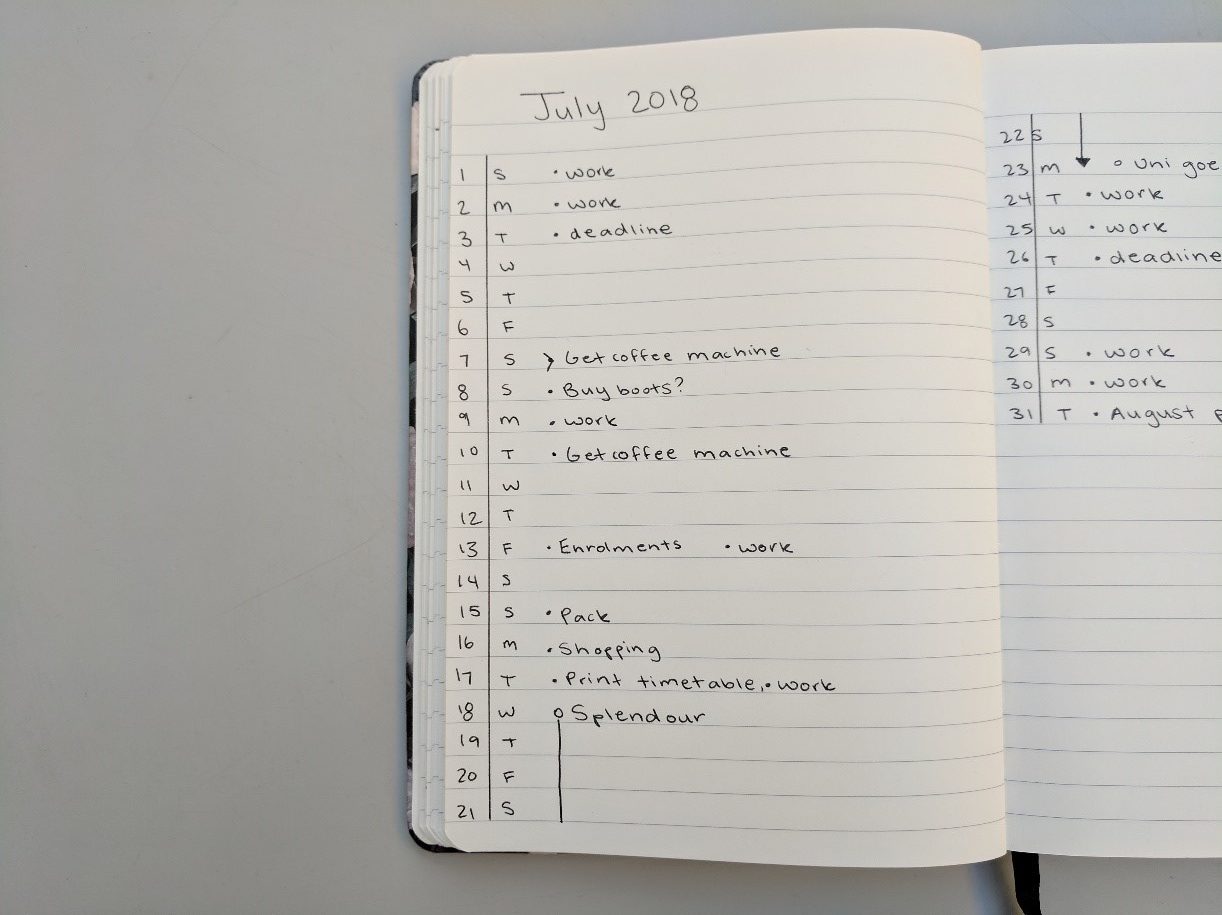
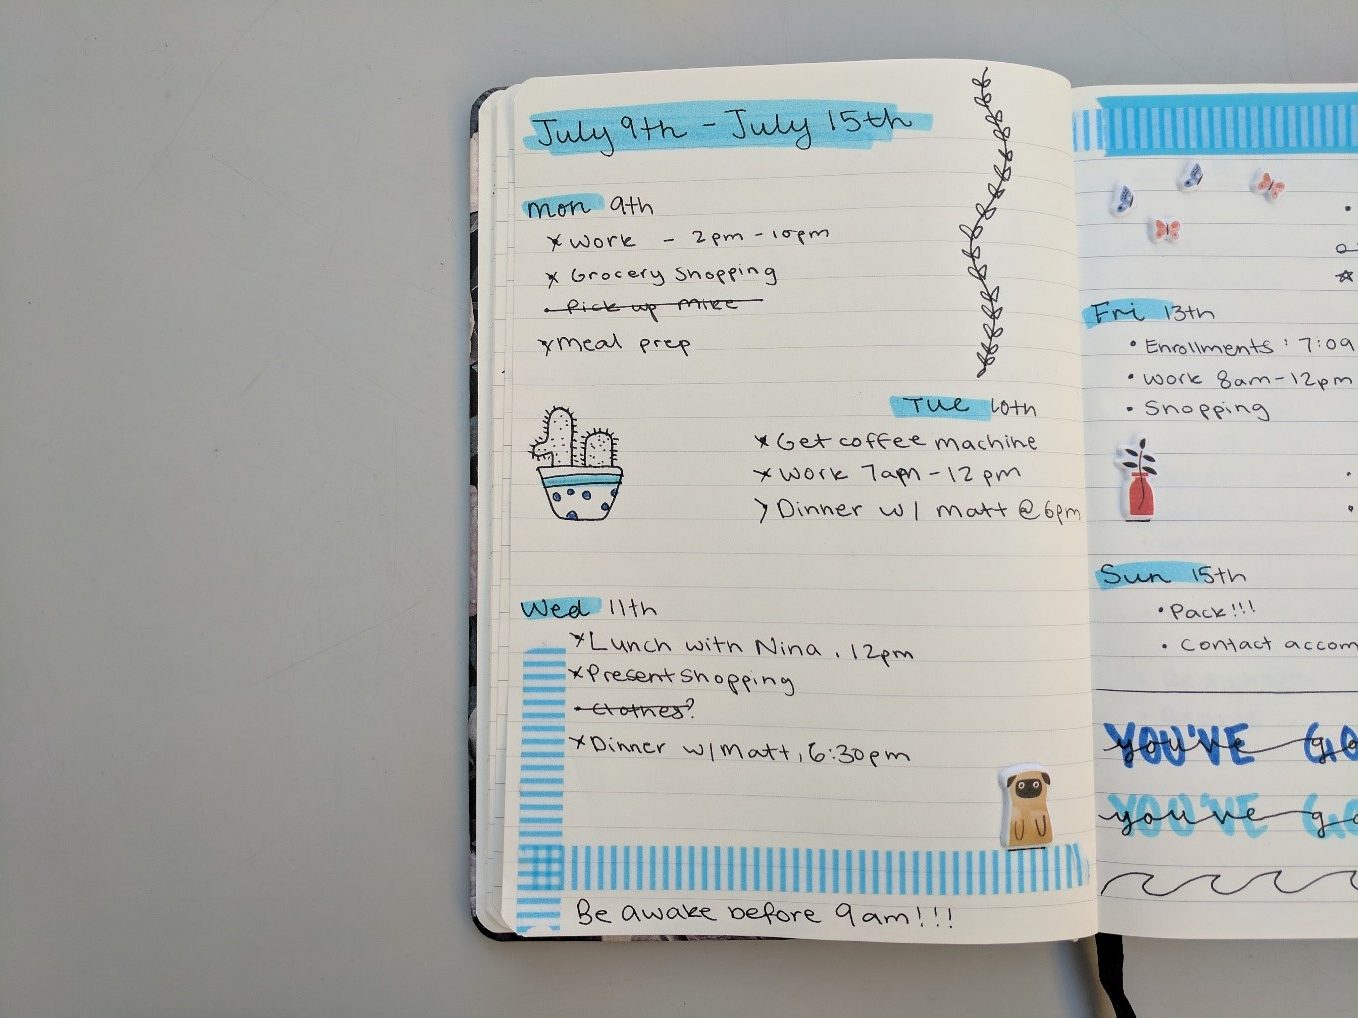
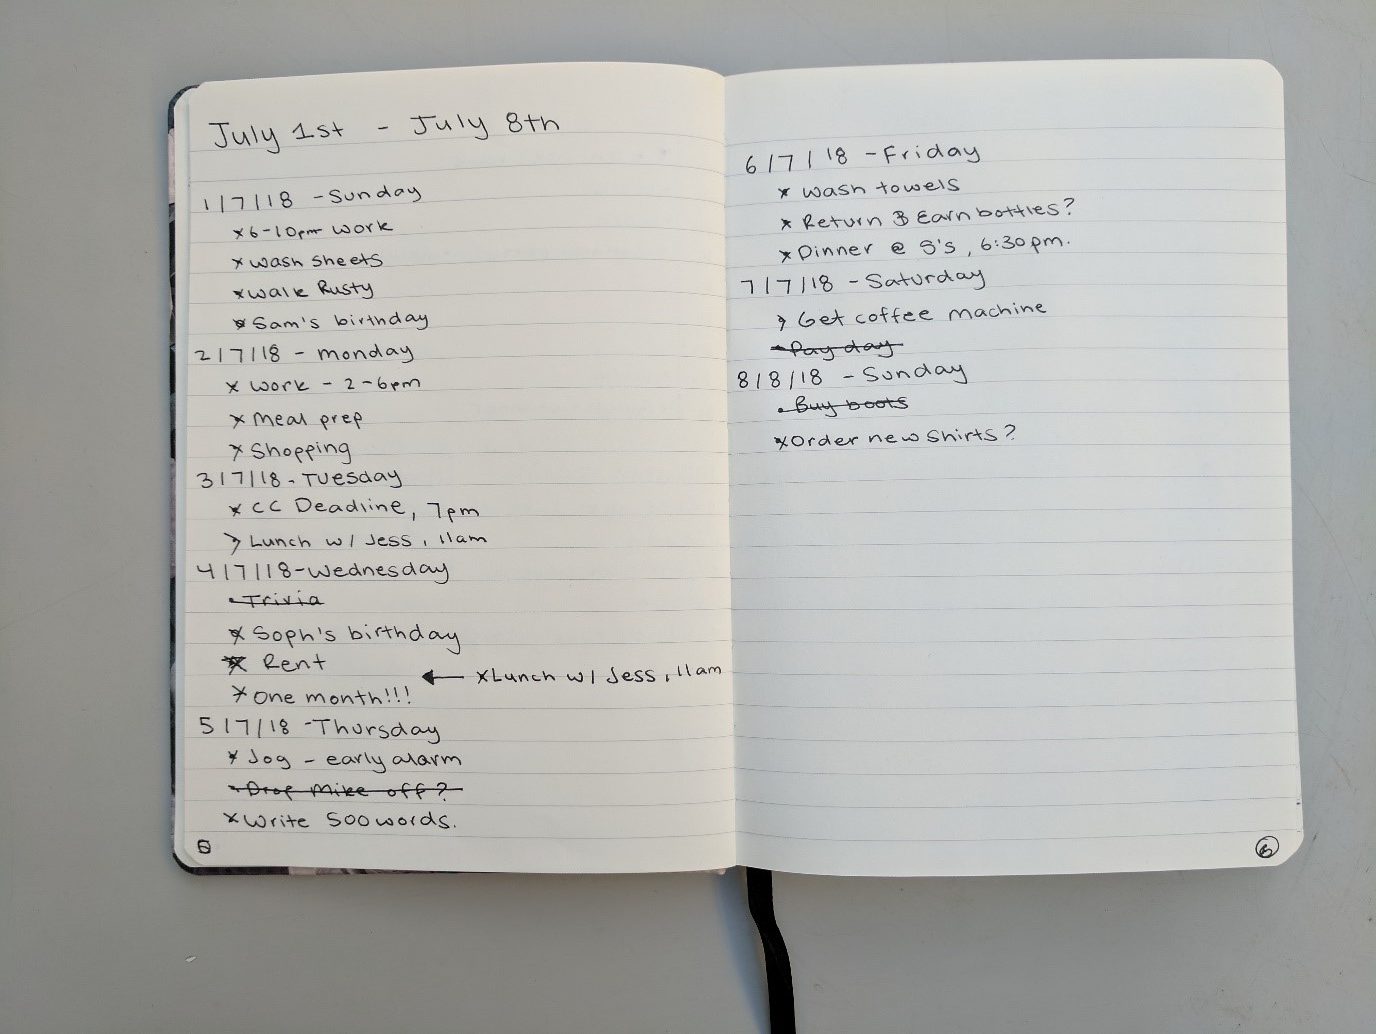
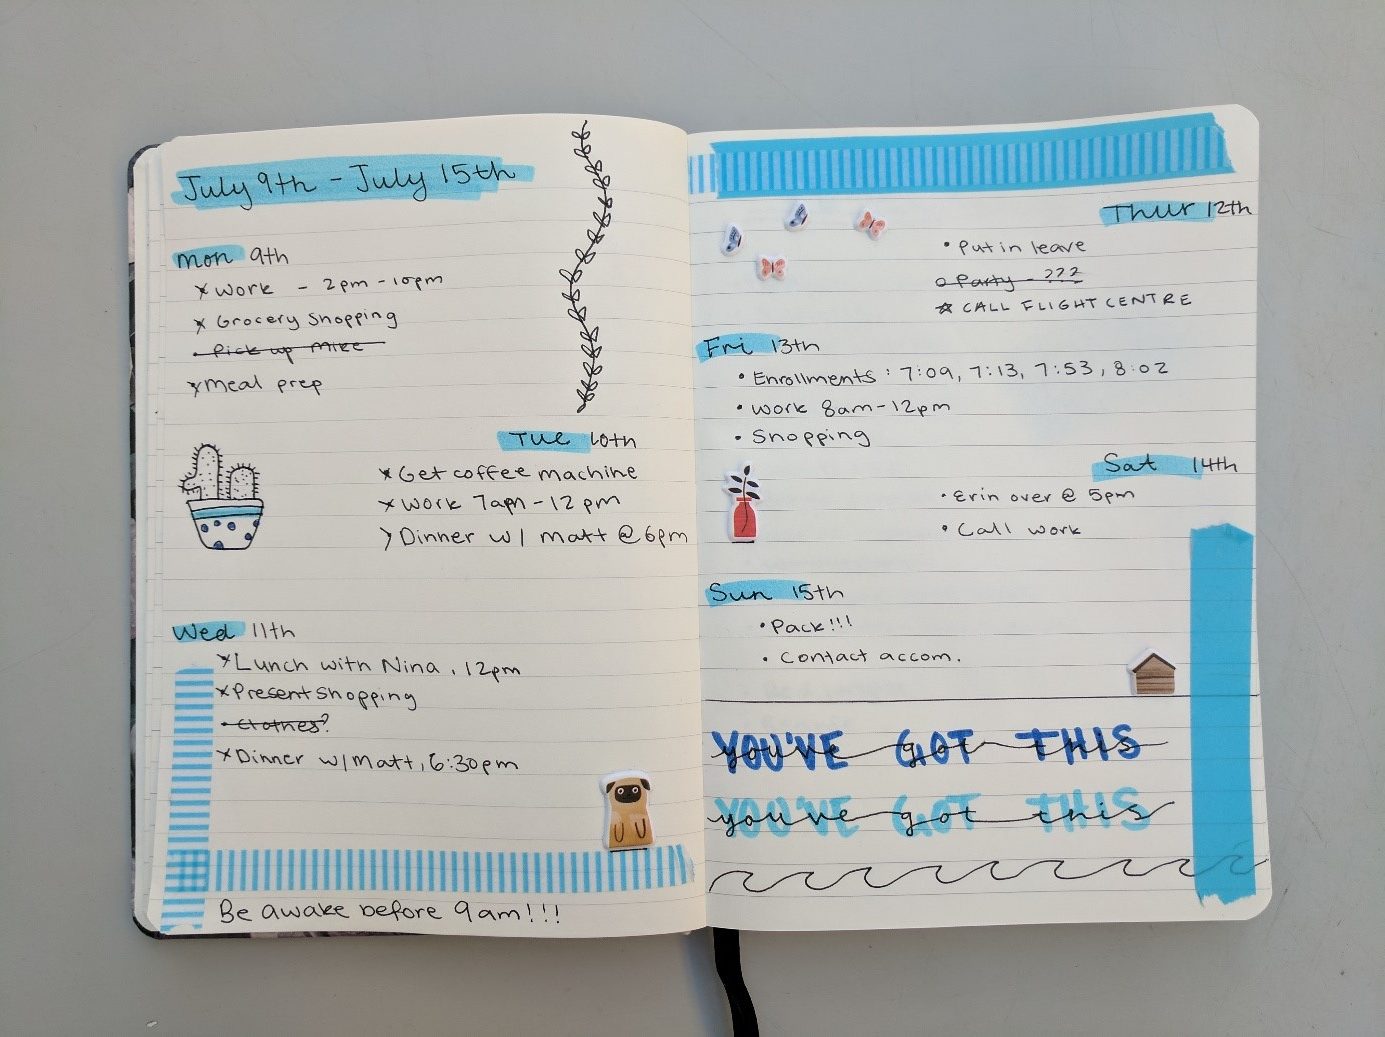
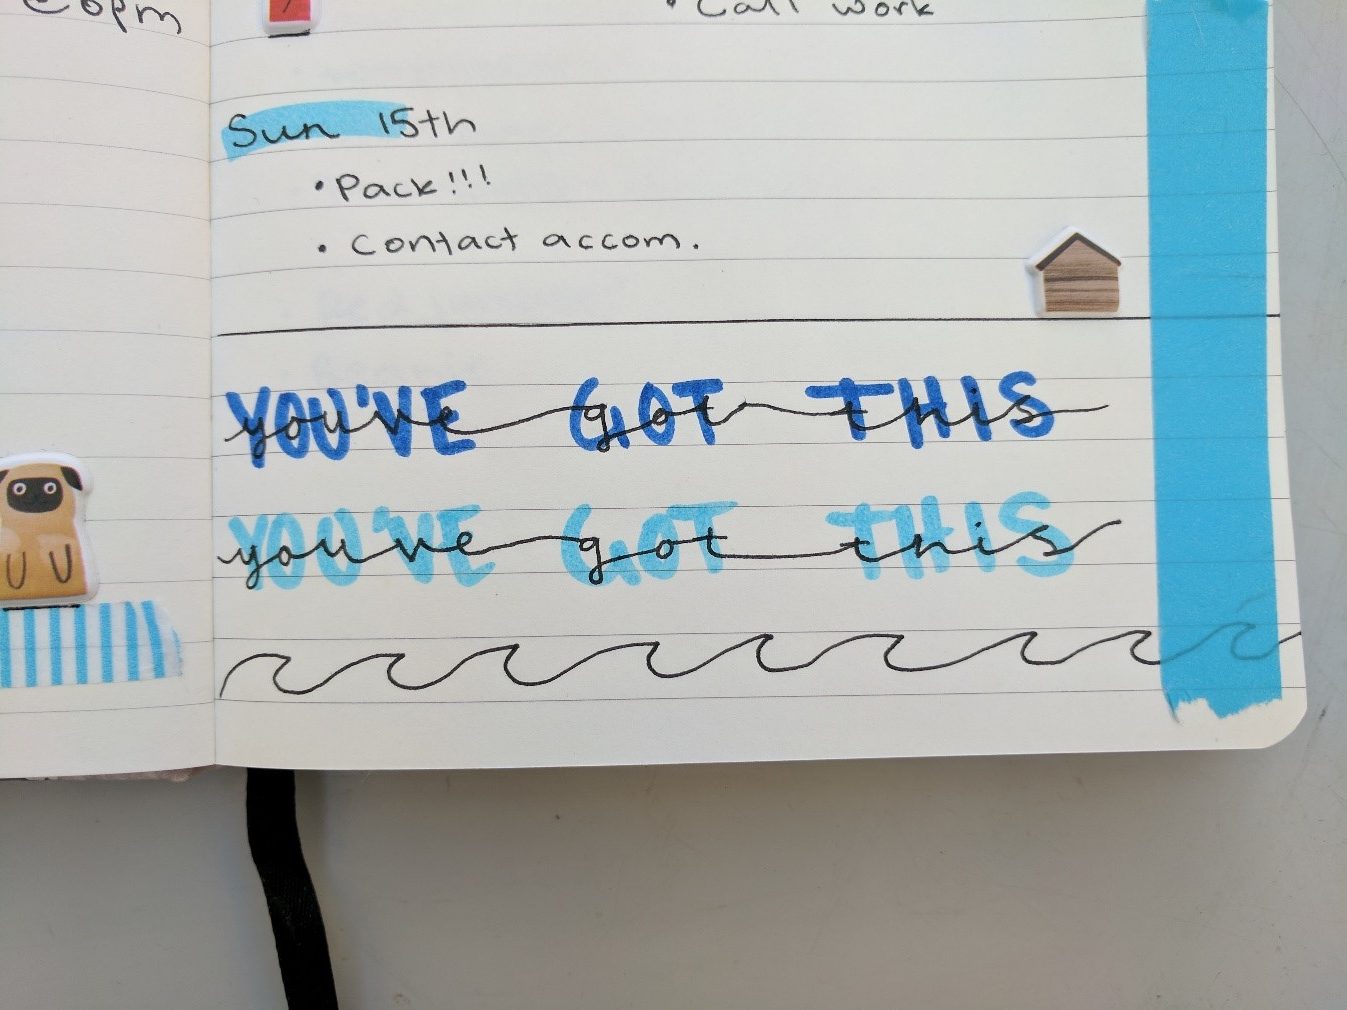
Here comes your weekly spread (the fun part). You can set this up however you like – if you’re busy, you can put one day per page. If you don’t have many plans, you can shove it all onto the one page if you like. The original bullet journal suggests simply writing down the dates and planning below them until you’re done. I personally like to spread it across two pages with a weekly title, eg. Week 1, Exam Week or just the starting and ending dates. Make it colourful or plain – it’s up to you!
Below are examples of weekly spreads.
That’s the basics of bullet journaling, but you can use it for much more.
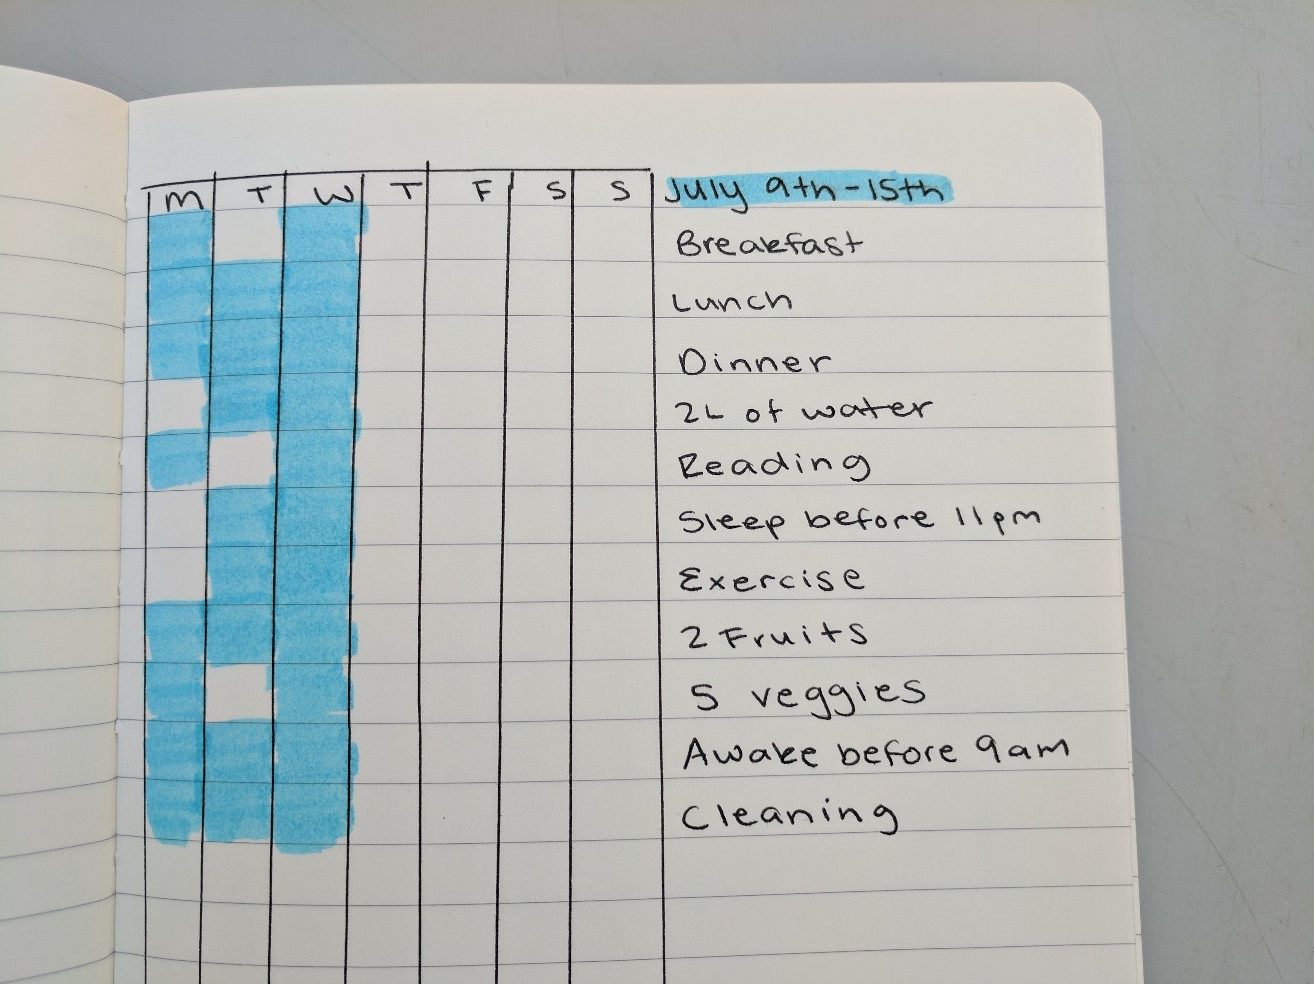
If you’re looking to make a habit out of drinking two litres of water per day, or going to bed before 11pm, don’t be afraid to use a habit tracker. Measure up a grid – as big or small as you like – and list out the days or dates as well as what habits you’d like to keep for this week or month. Cross out or highlight the box for everything you’ve done for the corresponding day.
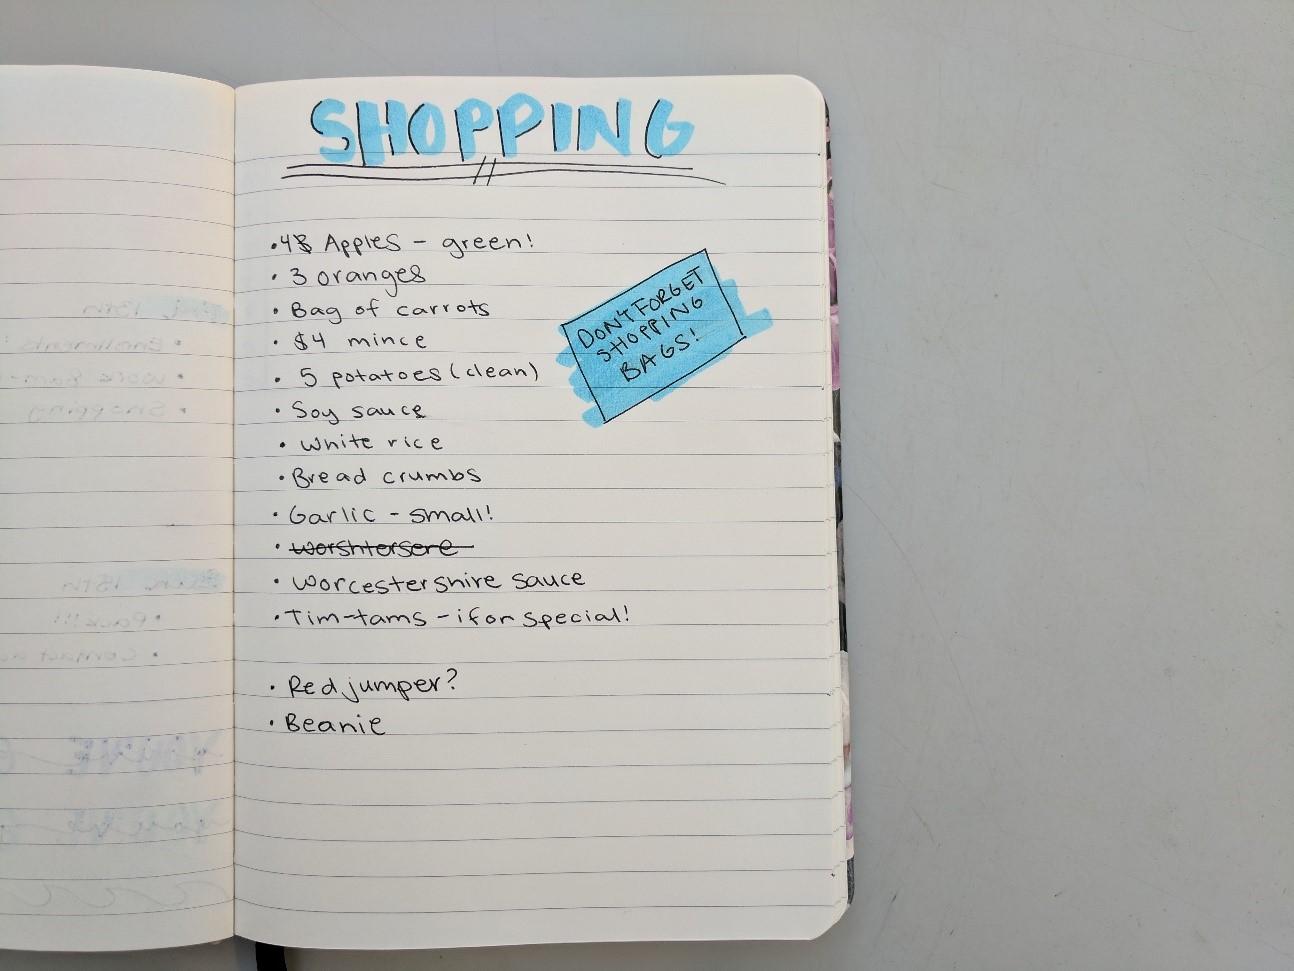
If you tend to forget things while shopping or you just like writing lists (2018 bucket list, anyone?) then keep it all in your BuJo and cross it off as you go.
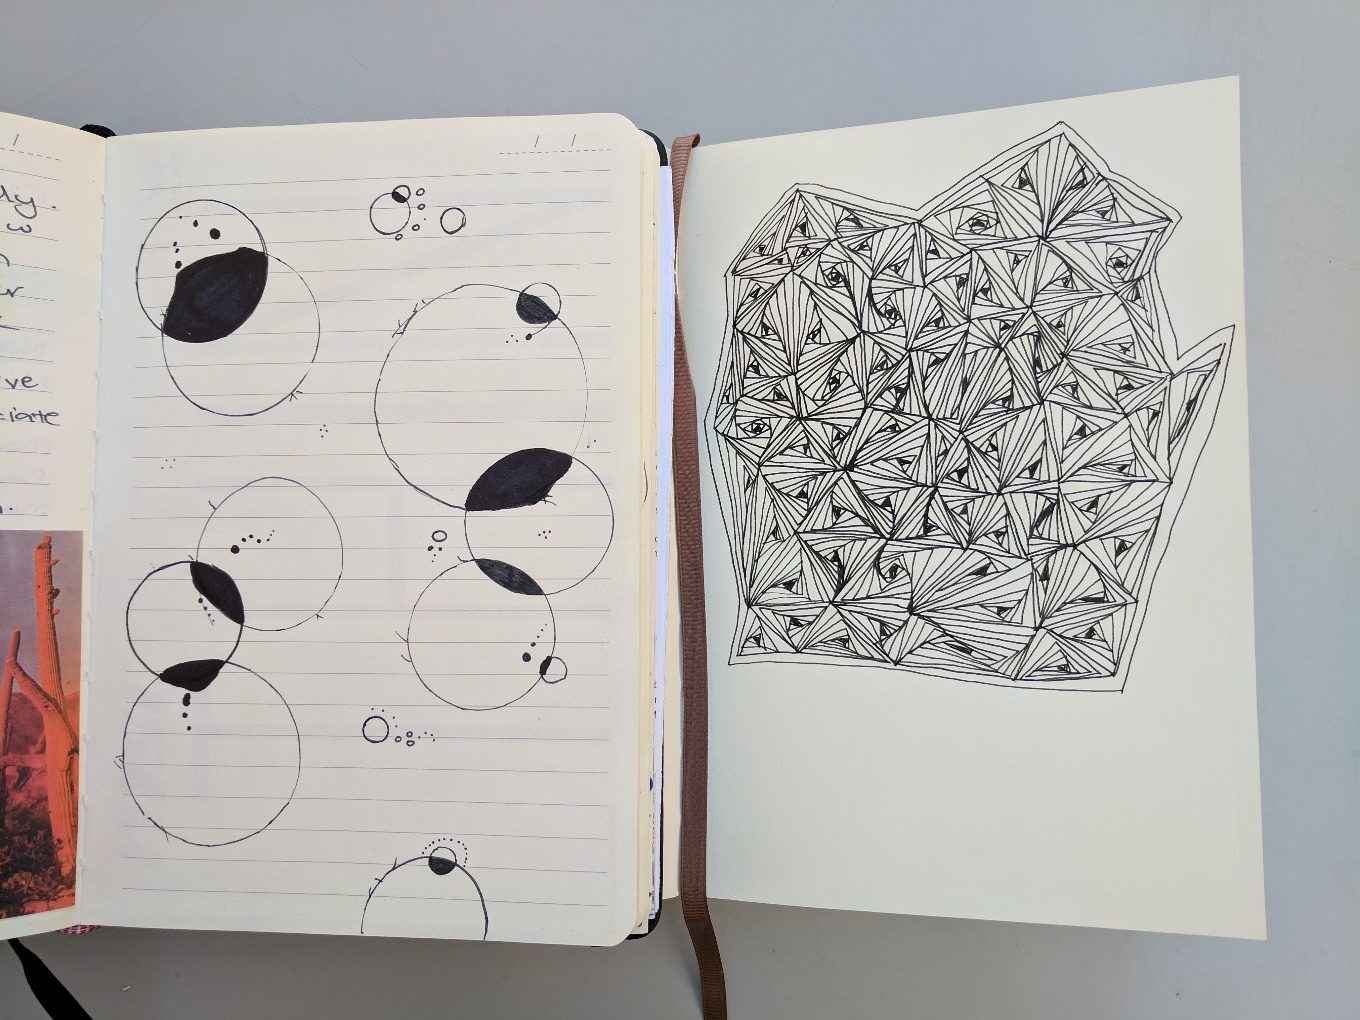
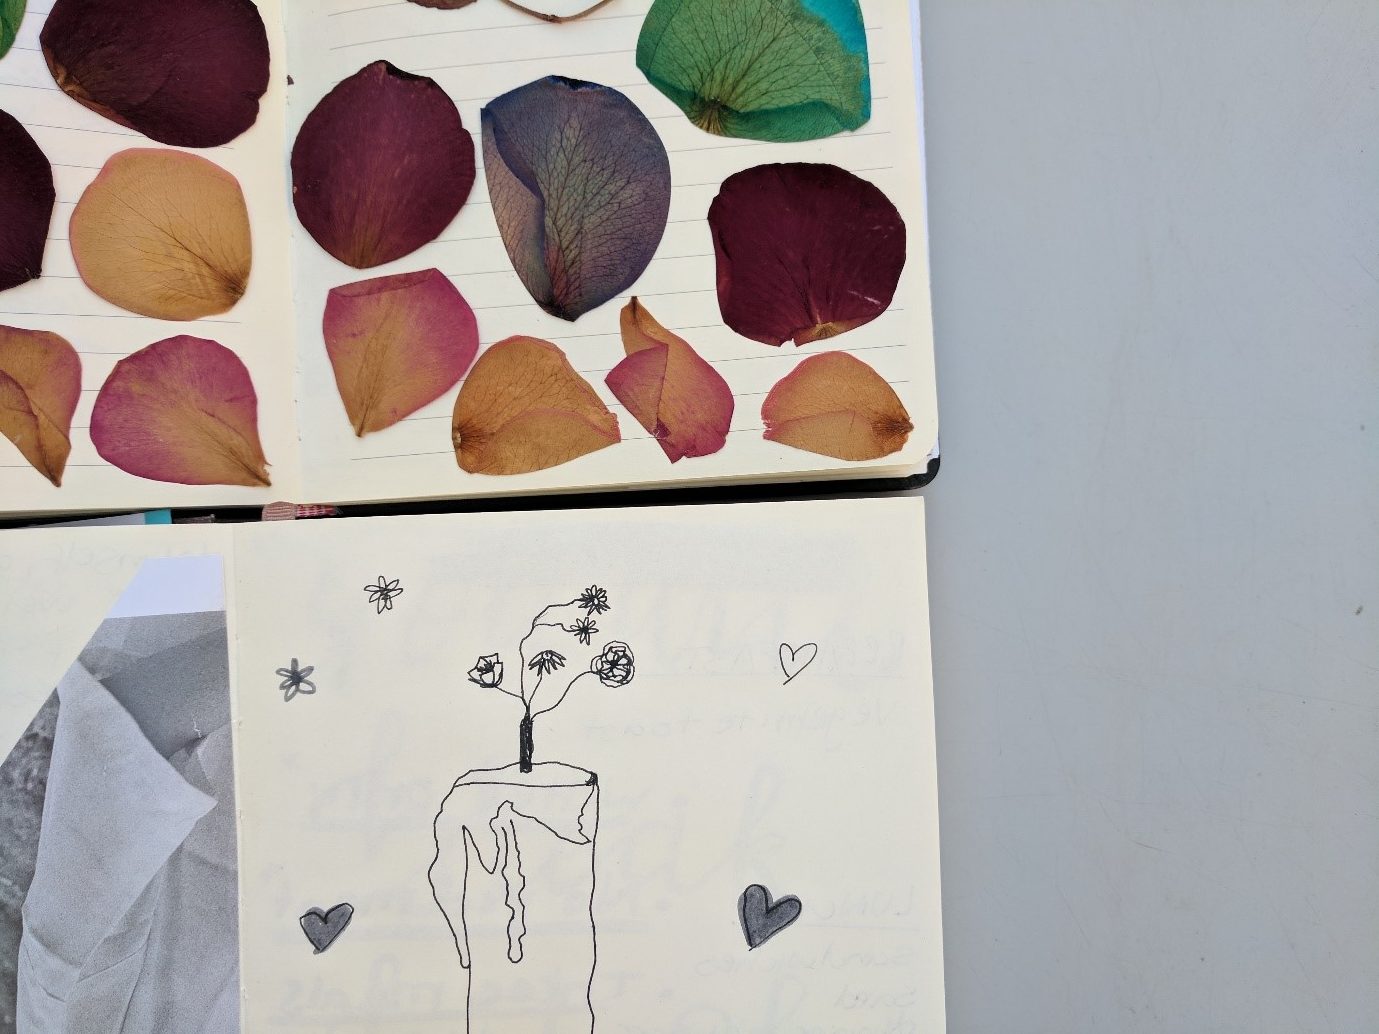
For many people, journaling is a safe place for you to let out your feelings, thoughts, drawings or anything you want. Bullet journals can still do this. Remember, this is for you and only you. Take this journal with you wherever you go, so if you get a burst of inspiration then write it on down. If you need to let out all your feelings, go for it. If you’re just bored and need to scribble, then let it all out.
Bullet journaling may seem difficult or scary at first, but it’s not. It’s a place for you to become more organised and express yourself. It can be as neat or as messy as you want – it’s your space. Add some fancy handwriting, some highlighting or some coloured tape to make it a little more colourful and fun. If you have a busy life or just like being organised, I’d definitely recommend trying out Bullet Journaling. It’s fun, easy, and it’s just for you.